Format Time Table Data Using the Table Context Menu
This applies to: Visual Data Discovery
Numeric data and time formats are set at the source. You can change them directly in a table using the table context menu. Your format changes apply directly to that visual, and affects every instance of that visual in your dashboards, without affecting the underlying source formatting. See Format Numeric Table Data Using the Table Context Menu. To edit date and time formatting for other visuals, see Configure Date and Time Formatting for Visuals.
Format time table data using the table context menu:
-
Select a table visual in a dashboard or in the Visual Gallery.
-
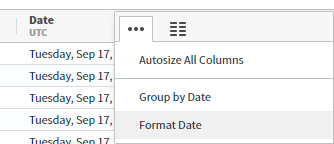
Locate the field in the table and select
 next to its column heading to access the table context menu.
-
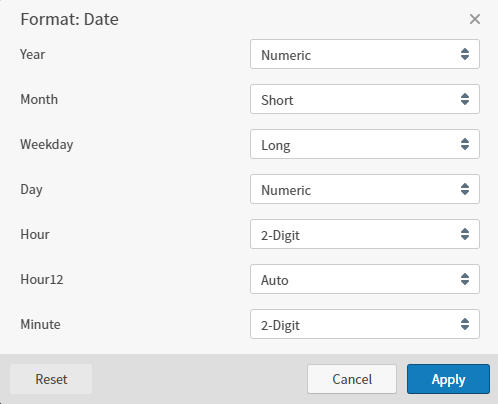
Select Format <field> on the context menu. A Format work area opens.

-
Select the appropriate date formats from available options. Options vary based on the granularity you define at the source level. See Date Time Format Options. Select Apply to apply your changes to the data in the table column, or Reset reapply the source formatting.
-
Optionally, repeat for other fields in the table.
-
Save the visual, or the dashboard and visual.
Format aggregated data using the table context menu:
-
Select a table visual in a dashboard or in the Visual Gallery.
-
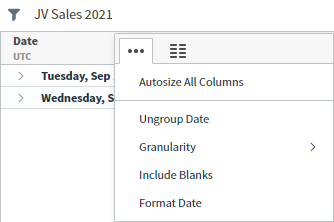
Locate the field that includes aggregated in the table and select
 next to its column heading to access the table context menu.
-
Select Format <field> on the context menu. A Format work area opens.

-
Select the appropriate date formats from available options. Options vary based on the granularity you define at the source level. See Date Time Format Options. Select Apply to apply your changes to the data in the table column, or Reset reapply the source formatting.
-
Optionally, repeat for other fields in the table.
-
Save the visual, or the dashboard and visual.
Date Time Format Options
The available fields vary based on the data available in the field.
| Format Option | Description |
|---|---|
| Second | Select Numeric (0-59) or 2-Digit (00-59). |
| Minute | Select Numeric (0-59) or 2-Digit (00-59). |
| Hour | Select Numeric (1-24) or 2-Digit (01-24). |
| Hour12 |
Select a 12 or 24 hour format option for Hour12.
|
| Day | Select Numeric (1-7) or 2-Digit (01-07). |
| Month | Select Numeric (1-12), 2-Digit (01-12), Long (January, March), Short (Jan, Mar), or Narrow (J, M). |
| Week | Select WeekStart, WeekEnd, Range, Narrow (w1-w53), Numeric (1-53), or 2-Digit (01-53). |
| Weekday | Select Long (Friday, Sunday), Short (Fri, Sun), Narrow (F, S), or None. The default is None, to show no day of the week. |
| Quarter | Select Range, Narrow, Numeric (1-4), or 2-Digit (01-04). Selections for Quarter are applied only if the time granularity is set to Quarter. |
| Year | Select Numeric (2022) or 2-Digit (22). |