Apply Even Time Intervals on Tables
This applies to: Visual Data Discovery
If you group a table by a time field, you can select even time intervals for that time field. For more information about even time intervals, see Even Time Intervals.
To apply even time intervals to a time field on a table from the table context menu:
-
Edit a dashboard with a table that uses a data source containing date or time fields.
-
Group the table by a time field in the data. See Group and Ungroup Table Data.
-
Select
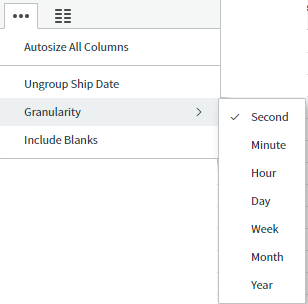
 next to the time field column heading to access the table context menu.
-
Select Include Blanks on the context menu. A check mark appears next to it.
Even time intervals are applied for the time field.
-
Save the dashboard.
To apply even time intervals to a time field using the sidebar menus:
-
Edit a dashboard with a table that uses a data source containing date or time fields. At least one field must be grouped.
-
If you are editing the visual in a dashboard, select Settings from the visual drop-down menu. The sidebar menu for the visual appears.
If you are editing the visual from the Visual Gallery, the sidebar appears to the right of the visual.
-
Select
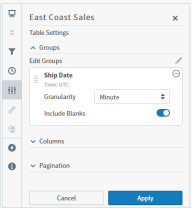
 on the sidebar menu. The Table Settings sidebar for the visual appears.
-
On the sidebar, select a time field in Groups.
The time field is selected and expands so you can select its granularity and even time intervals setting.

-
Select the granularity for the time field.
-
Slide Include Blanks on to request even time intervals. By default, the ability to show all values is disabled and only attributes with a value greater than NULL are displayed.
-
Select Apply to apply the changes to the table.
-
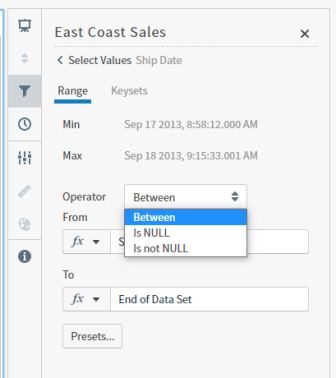
Optionally, select Filter to include a Null filter for this field on the Range tab as needed:
- Apply
Is not NULLto hide null values - Apply
Is NULLto include only null values

Select Continue to add the filter, then Apply to apply your changes to the table.
- Apply